How to Level Boat Lift: Step-by-Step Guide for Smooth Docking
If you’ve ever struggled with an uneven boat lift, you know how frustrating it can be. Learning how to level boat lift equipment is an essential skill for every boat owner. A lift that’s not level can make docking stressful, strain your boat, and cause long-term damage. By following a few simple steps, you can keep your boat lift balanced and ensure smooth, safe docking every time.
Why Is It Important to Level a Boat Lift?
Before we jump into the steps, let’s look at why leveling matters.
- Protects your boat: An uneven lift puts stress on the hull, which can lead to damage.
- Prevents mechanical issues: A tilted lift makes the winch, cables, and pulleys work harder, shortening their lifespan.
- Ensures safe docking: A level boat lift makes launching and docking much easier and safer.
- Increases longevity: Regular adjustments help your boat lift last longer, saving you from costly repairs.
Tools and Materials You’ll Need
To make the process smoother, gather these tools before starting:
- Carpenter’s level (2–4 feet long)
- Wrenches or socket set
- Measuring tape
- Work gloves
- Adjustable lift legs or leveling pads (if your model requires them)
Step-by-Step Guide to Leveling a Boat Lift
Step 1: Inspect the Lift

Begin by giving your boat lift a visual inspection. Look for signs of uneven wear, tilted posts, or cables pulling at an angle. This will help you identify which side of the lift is lower.
Step 2: Position the Boat Correctly

If your boat is on the lift, make sure it’s centered. An off-center boat can make the lift appear uneven, so correct positioning is crucial before making adjustments.
Step 3: Measure the Waterline

Lower your boat into the water slightly and check how it sits compared to the dock and waterline. Use a carpenter’s level across the lift beams to confirm if one side is higher or lower.
Step 4: Adjust the Lift Legs or Pads
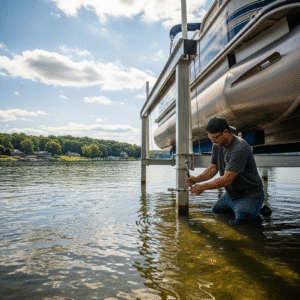
Most boat lifts come with adjustable legs or leveling pads. Use your wrench or socket set to raise or lower the legs as needed. Adjust one side at a time, checking the level after each adjustment.
Pro Tip: Make small adjustments instead of big changes you’ll avoid overshooting the correct height.
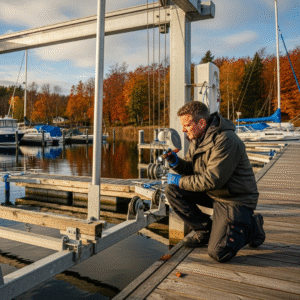
Step 5: Check the Cables and Pulleys
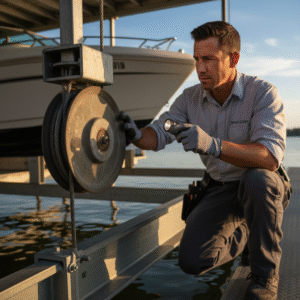
Sometimes, uneven lifts are caused not by the legs, but by cable tension. Inspect all cables and pulleys to ensure they are evenly tightened. Adjust cable lengths if necessary to balance the lift.
Step 6: Test the Lift

Once adjustments are made, raise and lower the lift fully to test its performance. Watch how the boat moves if it comes up smoothly and evenly, your lift is properly leveled.
Step 7: Repeat Seasonal Checks
Water levels, tides, and shifting ground can cause your boat lift to tilt again over time. Make it a habit to check and re-level your lift at least once every boating season.
Common Mistakes to Avoid
-
- Ignoring small tilts: A slight lean may not seem like a big deal now, but it can cause major problems later.
- Over-tightening cables: Too much tension can strain your lift’s mechanics.
- Skipping seasonal checks: Regular inspections are key to long-term performance.
Final Thoughts
Now that you know how to level boat lift equipment step by step, you can protect your boat, extend the life of your lift, and enjoy stress-free docking. A properly leveled lift doesn’t just make boating easier it ensures safety and peace of mind every time you head out on the water. For high-quality boat lift solutions and expert support, trust Dockstop to keep your boating experience smooth and reliable.